冷冻玉米棒上或玉米棒下的玉米
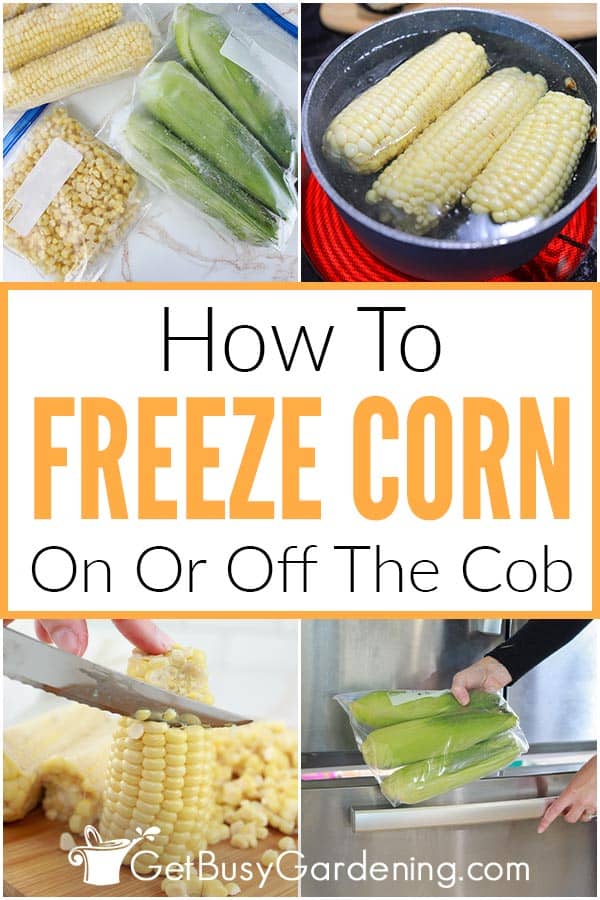

Table of contents
冷冻玉米棒子是一种很好的方法,可以让您在几个月内都能品尝到田园里的新鲜风味。 在这篇文章中,我将向您介绍您需要了解的所有知识,并提供详细的步骤说明。
没有什么比新鲜玉米棒子的味道更好了,它是如此美味的夏日美食。 如果有一种方法能让我们一年四季都能享用它,那该多好,不是吗?
现在你可以了!冷冻新鲜玉米可以锁住玉米的风味,而且可以保存到明年(如果你没有在明年之前吃光的话)。
这是保存自家种植的丰收果实、农贸市场或杂货店的新鲜农产品的绝佳方式。
下面我将向您介绍冷冻新鲜玉米的简单步骤,无论是连皮冷冻还是脱皮冷冻。
准备冷冻玉米
准备冷冻玉米只需几个简单的步骤。
您可以选择保留玉米棒,去壳或不去壳,也可以去核。 这完全取决于您。
这取决于您有多少时间和冷冻室空间,以及您打算将来如何使用它。
虽然焯水不是必须的,但事先焯水可以防止蔬菜变糊,有助于保持其风味,并使颜色更鲜艳。
See_also: 如何在家种植韭菜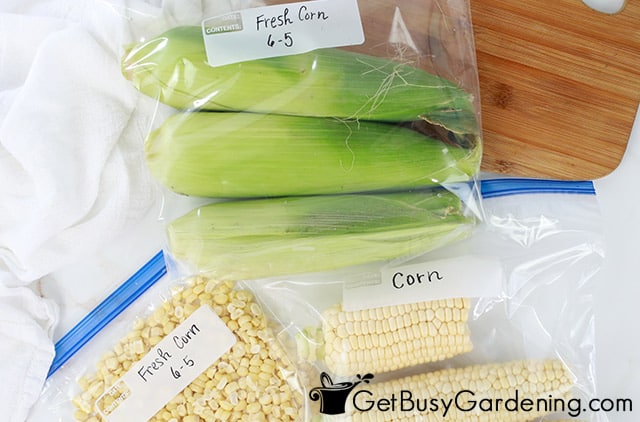 冷冻玉米的三种不同方法
 冷冻玉米可以不焯水吗?
玉米不用焯水也可以冷冻,不过解冻后可能会变糊。
如果您打算用它来制作果泥、汤或其他类似的食谱,这也是可以的。
不过,如果您想让它保持紧实,那就一定要先焯水。
如何焯玉米棒上或玉米棒下的玉米
要在冷冻前将玉米焯一下,首先要去掉玉米皮和玉米丝,然后将玉米棒放入一大锅沸水中烫一下即可。
注意不要煮得太熟,否则会变糊。
然后将其从锅中取出,立即放入冰水中停止烹饪过程。
 冷冻前将玉米棒焯水
 冷冻玉米棒
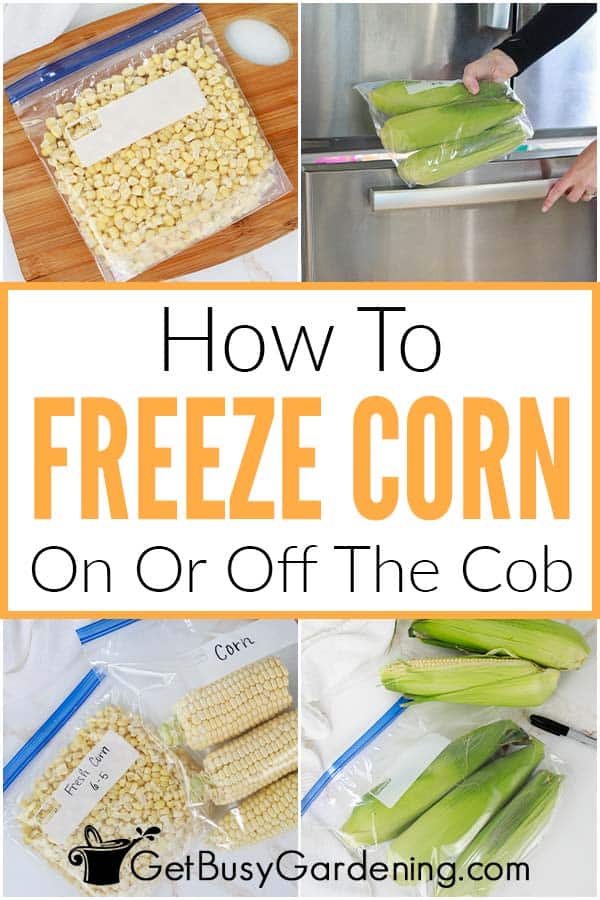
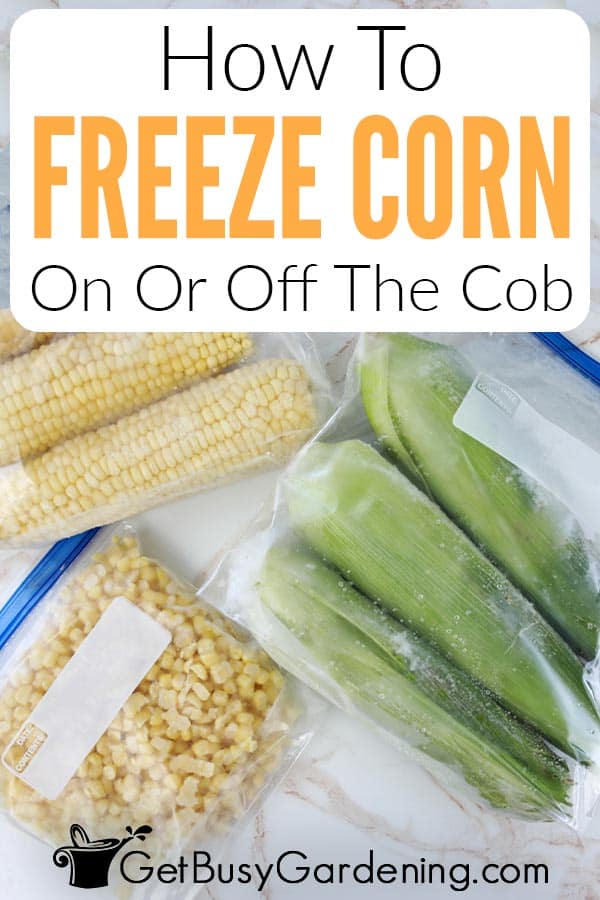
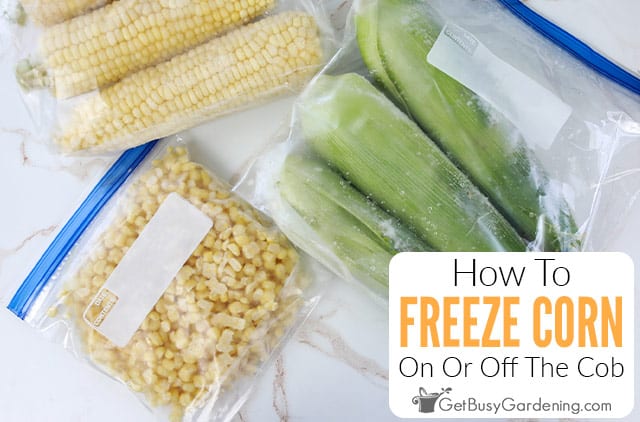
将玉米棒直接冷冻既简单又方便,而且绝对是最快的方法。 不过,冷冻玉米棒确实会占用冰箱中更多的空间。
开始之前,一定要冲洗掉外皮上的污垢和碎屑。
如果决定去壳,先把耳朵两端切掉,这样更容易去壳。 然后在水龙头下冲洗,直到所有的丝都去掉。
冷冻玉米棒
把玉米棒切下来再冷冻也是一个不错的选择,而且还能节省空间。 这样还能快速加热,做成配菜或放入食谱中。
另一种方法是使用剥棒器或削皮工具。
我喜欢把 1-4 杯装在较小的袋子里,但你也可以根据自己的用途随意分装。
注意:如果打算焯水,应在玉米棒上焯水,待完全冷却后再切掉玉米粒。
 冷冻前从玉米棒上取下玉米
 所需工具和用品
下面列出了所有这些方法所需的工具和用品,但根据您选择使用的工艺,您可能不需要所有工具和用品。
- 锋利的厨师刀
请在下面的评论区分享您冷冻玉米的小窍门。
逐步说明
如何冷冻玉米

冷冻新鲜玉米有两种方法:1.将其留在玉米棒上(带壳或不带壳),或 2.将玉米粒从玉米棒上切下来。 下面我将为您介绍这两种方法的详细步骤。
See_also: 准备和amp;为家庭罐头消毒罐子配料
- 未去皮的整玉米
说明
- 剪掉耳朵的两端 无论您是否打算去壳,首先都要去掉两端,用一把锋利的小刀将其从茎基部下方和果穗顶部上方切下。
- 去掉外皮和蚕丝(可选)。 但如果要焯水,必须先剥壳。
- 冲洗(可选) - 在水龙头下冲洗耳朵时,用手轻轻搓掉残留的丝。
- 焯一下(可选) - 如果您选择在冷冻前将玉米棒焯水,可将玉米放入沸水中(小玉米棒焯水 6 分钟,中玉米棒焯水 8 分钟,大玉米棒焯水 10 分钟)。 之后立即将玉米棒放入一碗冰水中,以停止烹饪过程。
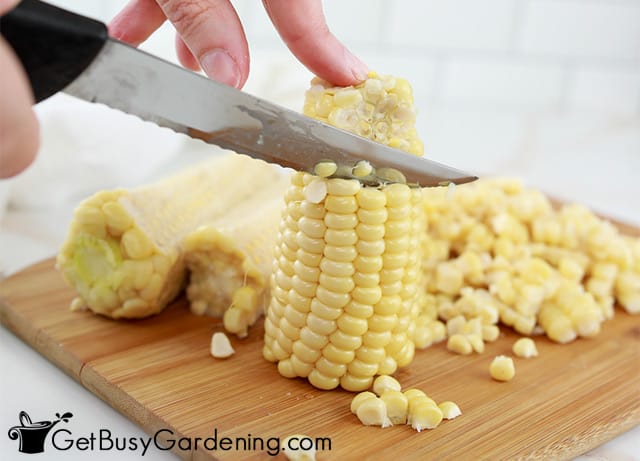
- 将玉米粒从玉米棒上切下来(可选)-- 如果您打算冷冻整个玉米棒,则可以跳过这一步。 否则,请用刀、削皮器或剥皮工具去除玉米粒。

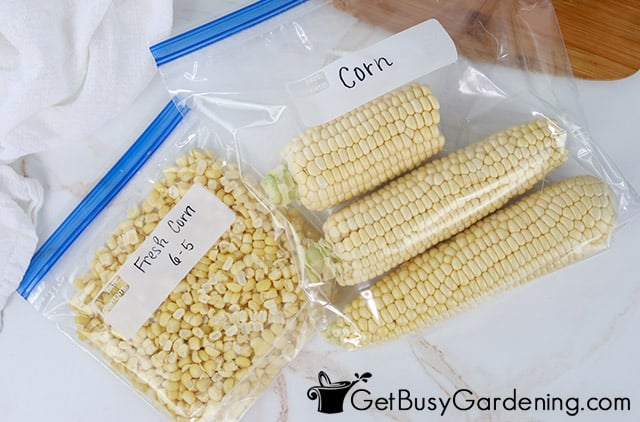
- 装入袋中 在将整个玉米棒放入冷冻袋之前,先将其拍干,这样玉米穗就不会粘在一起。 否则,将所需数量的玉米粒倒入每个冷冻袋中。 在密封袋口之前,轻轻去除多余的空气,使其占用最少的空间。

- 贴标签 用记号笔在袋子上写上玉米的种类和冷冻日期。
- 保存在冰箱中 - 将玉米袋放入冰箱冷冻,可保存 12 个月。